Have you ever wondered why your curls fall flat or look unnatural shortly after styling? Unlock the secrets to achieving perfect curls at home with our comprehensive guide. From the initial preparation to the final styling touches, we will walk you through every essential step to achieve salon-quality curls that last.
When curling hair at home, starting with the right preparation is key. Ensure your hair is damp but not wet, setting the stage for the perfect curls. One common mistake to avoid is curling inward, which can create an unnatural look. Instead, we recommend outward curling to achieve a more natural appearance.
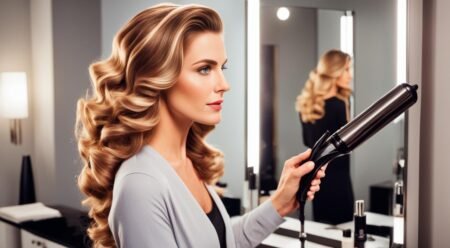
Choosing the right curling iron is equally important. A wand without a clamp is preferred to avoid unwanted crimps. Experts emphasize the significance of never starting above the ears, as this ensures a more natural layout. For a looser curl, leave an inch of hair out of the curling iron.
Using heat protection is a crucial step in maintaining healthy hair while achieving perfect curls at home. GK Hair ThermalStyleHer is an excellent choice, providing both protection and nourishment. Applying a heat protectant like Argan oil can also help condition your hair, making it suitable for all hair types.
While hairspray can be used to maintain volume and balance, moderation is key. Overuse can weigh down the curls, so we recommend a light application. To keep your curls intact overnight, try the Sleep Bun method, which allows you to wake up with ready-to-go curls.
A surprising tip to maintain curl longevity is to wait a few days before washing your hair. This helps the curls settle into their best form, giving you longer-lasting style without the need for daily re-styling.
Key Takeaways
- Start curling with hair that is damp, not wet, for better results.
- Outward curls are recommended to achieve a more natural look.
- Use a curling wand without a clamp to prevent unwanted crimps.
- Begin curling under the ears to maintain a natural appearance.
- Always use heat protectants like GK Hair ThermalStyleHer to shield from heat damage.
- Moderate your hairspray usage to maintain volume and balance.
- Wait a few days before washing hair to let curls settle into the best form.
Choosing the Right Tools for Curling Hair
When we talk about curling our hair, the first step is selecting the best tools for the job. This decision can significantly impact the outcome of your curls and the health of your hair. Let’s delve into the essential tools you’ll need.
Selecting the Best Curling Iron
The variety in curling iron recommendations is vast and tailored to different hair types and desired styles. For delicate or chemically treated hair, we recommend a curling iron with a temperature setting below 300°F to avoid unnecessary damage. On the other hand, those with coarse, thick hair may find better results with settings ranging from 350°F to 450°F.
When it comes to versatility and effectiveness, a curling wand tutorial often highlights the advantages of clampless wands. Such tools, like the acclaimed Nume wand, help achieve smooth, crimps-free curls. Here is a comparative table of top-rated curling irons tailored to various needs:
| Product | Price | Features |
|---|---|---|
| Dyson Airwrap Multi-Styler Complete Long | $599 | Best Overall, Multiple Attachments |
| Conair Double Ceramic 1-Inch Curling Iron | $19 | Best Value, 1-Inch Ceramic Barrel |
| The Beachwaver Co. S1 Dual Voltage | $149 | Best for Fine Hair, Rotating Barrel |
| Paul Mitchell Pro Tools Express Gold Curl Marcel Curling Iron | $75 | Best for Thick Hair, Titanium Barrel |
| Amika High Tide Deep Waver | $120 | Best for Beachy Waves, Triple Barrel |
The size of the barrel is also crucial. For versatile styling, a 1-inch barrel works well on various hair lengths, while a 1.5-inch barrel is perfect for loose beachy waves. If you’re aiming for big, blown-out waves, a 2-inch barrel might be your go-to.
Other Tools You Might Need
Aside from curling irons, additional tools can make a huge difference in achieving the best hair curling techniques. Wide-tooth combs are fantastic for reducing frizz and preserving the definition of your curls. Using a paddle brush before curling can help detangle hair and smooth the top section, setting a good base for styling.
Heat protectants are another essential. Nume’s Argan oil is a popular choice, providing protection and nourishment without sacrificing the shine of your curls. Don’t forget to let your hair cool completely before touching the curls to ensure they set properly.
By integrating the right tools and techniques, you can elevate your curling game to professional levels. From selecting the best curling iron to using the appropriate brushes and heat protectants, each element plays a crucial role in the final look.
Prepping Your Hair for Curls
Before diving into the actual curling process, it’s essential to prepare your hair to ensure optimal results and reduce potential damage. Let’s delve into some professional hair styling tips to perfect the prep phase.
Using Heat Protectants
One of the crucial steps in learning how to curl hair effectively is by using a heat protectant. Whether you opt for a spray or an oil like Argan oil, this product acts as a shield against the high temperatures from styling tools. Products such as Colleen Rothschild shampoo and conditioner offer a solid foundation, while a good hair mask and scalp treatment can restore health and shine. Heat protectants are non-negotiable to maintain hair integrity while achieving styled perfection.
Sectioning Your Hair
Proper sectioning of hair plays a pivotal role in executing precise curls. Begin by creating horizontal parts above the ear and then work through manageable vertical sections. This method not only provides a more structured styling process but also ensures even heat distribution for consistent curls. Adjusting the temperature settings based on your hair type is another key step: 325°F for fine hair, 390°F for thicker locks, and up to 410°F for curly or textured hair. These temperatures help in achieving professional-standard results while minimizing potential hair damage.
Below is a table summarizing the recommended practices based on hair length and type:
| Hair Length | Recommended Barrel Size | Optimal Temperature Settings |
|---|---|---|
| Long Hair | 1.25” Barrel | 390°F – 410°F |
| Shoulder-Length or Shorter | 1” Barrel | 325°F – 390°F |
| Curly or Textured Hair | Variable | Up to 410°F |
Remember, choosing the right tools and products makes a significant difference in the quality and longevity of your curls. Employing these professional hair styling tips ensures that your curls are not just stylish but also healthy and well-maintained.
How to Curl Hair with a Curling Iron
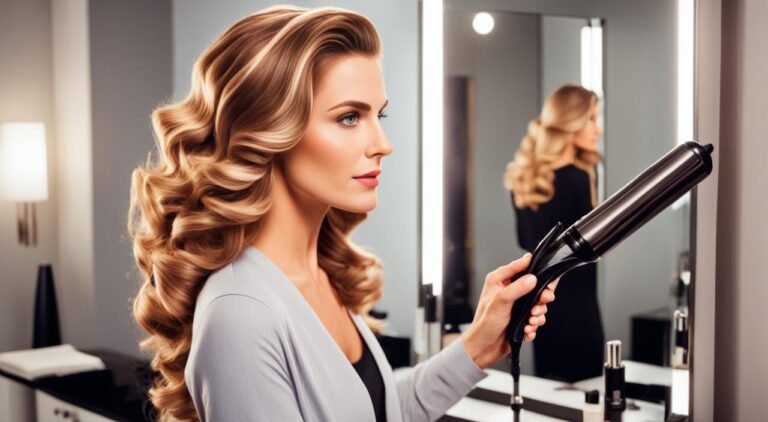
To master the art of curling hair with a curling iron, we start by brushing out any tangles and applying a heat protectant to shield the hair from damage. Using a ceramic curling iron is highly recommended as it generates even heat distribution and prevents damaging the hair by heating from the inside out. Depending on the desired curl style, we can opt for different barrel widths. A 1-inch barrel is versatile enough for all hair lengths and creates natural-looking waves, whereas a 3/4-inch barrel can achieve voluminous curls, and a 3/8-inch barrel is perfect for tighter curls.
Next, sectioning the hair into 4 to 5 parts is ideal, especially for those with thicker hair. This allows for better heat distribution and more defined curls. We recommend starting the curl closest to the roots for the best hold and alternating the curl direction to create a natural look. If achieving beachy waves, be sure to leave about 1-2 inches out at the end of each curl.
- Start by capturing a 1-inch section of hair and wrapping it around the wand, which should be pointed downwards.
- Hold the curl for a few seconds to let it set.
- To ensure the longevity of each curl, clip the sections in place until they cool.
Using the best hair curling techniques, such as avoiding curling the bottom layers from behind the ear down, can help streamline the overall look. For additional hold, a light spritz of hairspray like the Kristin Ess Working Texture Spray can keep the curls intact throughout the day. Alternatively, for those who prefer a more defined look, consider using the Kristin Ess Beach Wave Spray after curling.
We emphasize the importance of keeping the curls hydrated between heat styling sessions. Conditioning products like PATTERN Heavy Conditioner and leave-in treatments like PATTERN Hydrating Mist are excellent for maintaining moisture and shine.
| Barrel Width | Best Use |
|---|---|
| 1 inch | Billowing waves or natural curl patterns |
| 3/4 inch | Curls with volume and bounce |
| 3/8 inch | Tight, well-defined curl clumps |
It’s essential to choose a curling iron with temperature control, such as the 25mm titanium Lustre wand from L’Ange, which heats up efficiently and only requires 5-7 seconds per section. Setting the iron to a temperature of around 370 to 390 degrees Fahrenheit provides consistent results without causing excessive heat damage.
By following this comprehensive curling wand tutorial, achieving perfect curls becomes simple and effective. Remember, practice and the right tools are key to mastering the best hair curling techniques.
Heatless Curling Methods
For those of us eager to avoid heat damage and embrace healthier hair, heatless curling methods are a lifesaver. They offer effective and easy ways to get curls without the harsh effects of traditional hot tools.
Overnight Methods
One popular heatless curling method is the ‘Sleep Bun.’ This technique involves securing the hair in a loose bun before heading to bed. By morning, you can enjoy soft, natural-looking curls that required zero heat application. Given that our author quit using curling irons or straighteners for almost four months, there was noted a visible and tangible difference in their hair just one week after quitting hot tools. This method is not only effective but also promotes healthier hair by avoiding heat damage that can lead to loss of shine and split ends.
Using Foam Rollers
Foam rollers are another excellent heatless curling method that provides easy ways to get curls. Unlike hot tools that may strip hair of moisture, foam rollers can create both tight and loose curls depending on the roller size. Larger rollers produce soft waves, perfect for a gentle, voluminous look, while smaller rollers result in tighter, more defined curls. Foam rollers can be used on both damp and dry hair, making them versatile for various hair types and routines.
- Plopping Method: Widely favored in curly-girl routines, this involves using a T-shirt or microfiber towel to scrunch and define curls.
- Robe Curls: Utilizes a robe belt placed on top of the head for creating waves.
- Sock Method: Yields varied results based on the technique and sock thickness.
- Leggings Method: A free alternative to curling headbands, effective for medium to large curls.
While these heatless curling methods don’t involve tools heated to high temperatures, they do rely on consistency and proper application. According to hairstylist Sandra Almanzar, avoiding heat minimizes cuticle damage, leading to shinier, healthier hair. By incorporating these techniques, we not only protect our hair from breakage and dryness but also enjoy easy ways to get curls that look and feel fantastic.
| Method | Cost | Effectiveness |
|---|---|---|
| Kitsch Heatless Hair Curler (Satin) | $16 | High |
| Crown Affair Clips | $54 | Medium |
| Vintage Cosmetic Pink Bendy Hair Curlers | $9 | Medium to High |
With the myriad of heatless curling methods available, achieving beautiful curls without heat damage has never been easier. Whether opting for foam rollers or the Sleep Bun, you’re on the path to healthier, stunning hair.
Techniques for Different Types of Curls
Understanding the different types of curls and mastering their techniques can elevate your hairstyling game to new heights. Whether you’re aiming for tight ringlets, loose waves, or beach waves, each style requires unique tools and methods to achieve the perfect look.
Tight Ringlets
To create tight ringlets, smaller curling barrels and sections are key. The Flat Wrap Hair with a Curling Iron technique is ideal for this style. By wrapping small sections of hair around a spring-loaded curling iron and maintaining a temperature below 392° F, you can ensure your hair color remains vibrant. Utilizing a thermal heat spray is crucial for protecting against heat damage. Additionally, Gisou hair products can provide the necessary nourishment and hold for your curls.
Loose Waves
Loose waves are all about elegantly tousled hair. Using larger barrels and sections can help achieve this relaxed look. The Lazy Curl with a Curling Iron technique works perfectly, featuring a slower wrap method with a professional flat iron for a soft, loose wave. Applying a texturizing wave spray before curling and using fingers to separate the curls can enhance the wave’s natural appearance. Adjusting the temperature based on hair type ensures optimal results without damage.
Beach Waves
Beach waves are a timeless style that many aspire to replicate. The secret lies in the right technique and products. Wrapping hair away from the face and tousling with fingers post-curling creates the desired beachy effect. For a heatless option, braiding damp hair before bed or using a bathrobe belt as inspired by Negin can produce effortless waves. Additionally, misting with a wave spray and scrunching hair enhances the natural curl. Proper sectioning, as advised in our guide, and choosing the right barrel size and section thickness are critical for achieving the look without compromising hair health.
